
Table of Contents
ToggleWood accent walls have become one of the most accessible ways to add texture, warmth, and architectural interest to any space, without gutting the room or hiring a design firm. Unlike paint or wallpaper, wood brings dimension and natural variation that shifts with light throughout the day. And in 2026, the range of materials, profiles, and installation methods means there’s a wood wall approach for every skill level and budget. Whether the goal is cozy farmhouse vibes or clean contemporary lines, the right accent wall wood can anchor a room and give it a finished, intentional look.
Key Takeaways
- Wood accent walls add texture, warmth, and architectural interest while remaining DIY-friendly, reversible, and requiring only basic carpentry tools for installation.
- Reclaimed wood planks deliver rustic charm with authentic weathered character but demand careful prep work including denailing, rot inspection, and kiln-drying for safe interior use.
- Horizontal shiplap offers a clean, contemporary look at an affordable cost ($0.50–$1.25 per linear foot) and can be installed using nickel-gap spacing with standard pine boards.
- Geometric wood panel designs like herringbone and chevron create high-design visual impact but require more precision, planning, and 15–20% extra material for waste.
- Vertical wood slat walls draw the eye upward, making them ideal for low-ceilinged rooms, and offer modular flexibility if design preferences change over time.
- Choosing the right wood type—softwoods like pine for budget projects or hardwoods like walnut for durability—paired with appropriate finishes like water-based polyurethane ensures longevity and intentional design.
Why Wood Accent Walls Are Trending in Modern Homes
Wood accent walls check multiple boxes for today’s homeowners: they’re DIY-friendly, reversible (in most cases), and offer a high-impact visual upgrade without the cost or commitment of built-in millwork.
Unlike full-room paneling, an accent wall focuses attention on one surface, typically behind a bed, sofa, or fireplace, making it manageable in scope and materials cost. Most installations require only basic carpentry tools: a miter saw or circular saw, a level, a stud finder, and adhesive or a finish nailer. No drywall removal is usually needed: planks or panels mount directly over existing wall surfaces.
The trend also aligns with biophilic design principles, which emphasize natural materials to improve indoor comfort and well-being. Wood grain, even when sealed or stained, introduces organic texture that softens modern interiors dominated by drywall and glass. Projects featured on platforms like HGTV regularly showcase accent wall wood as a go-to update in bedroom and living room makeovers.
From a practical standpoint, wood can hide wall imperfections, minor cracks, patch jobs, or outdated textures, under a new surface layer. And because it’s typically a non-structural cosmetic install, permits aren’t required in most jurisdictions (always verify local codes if you’re routing electrical or gas lines behind the wall).
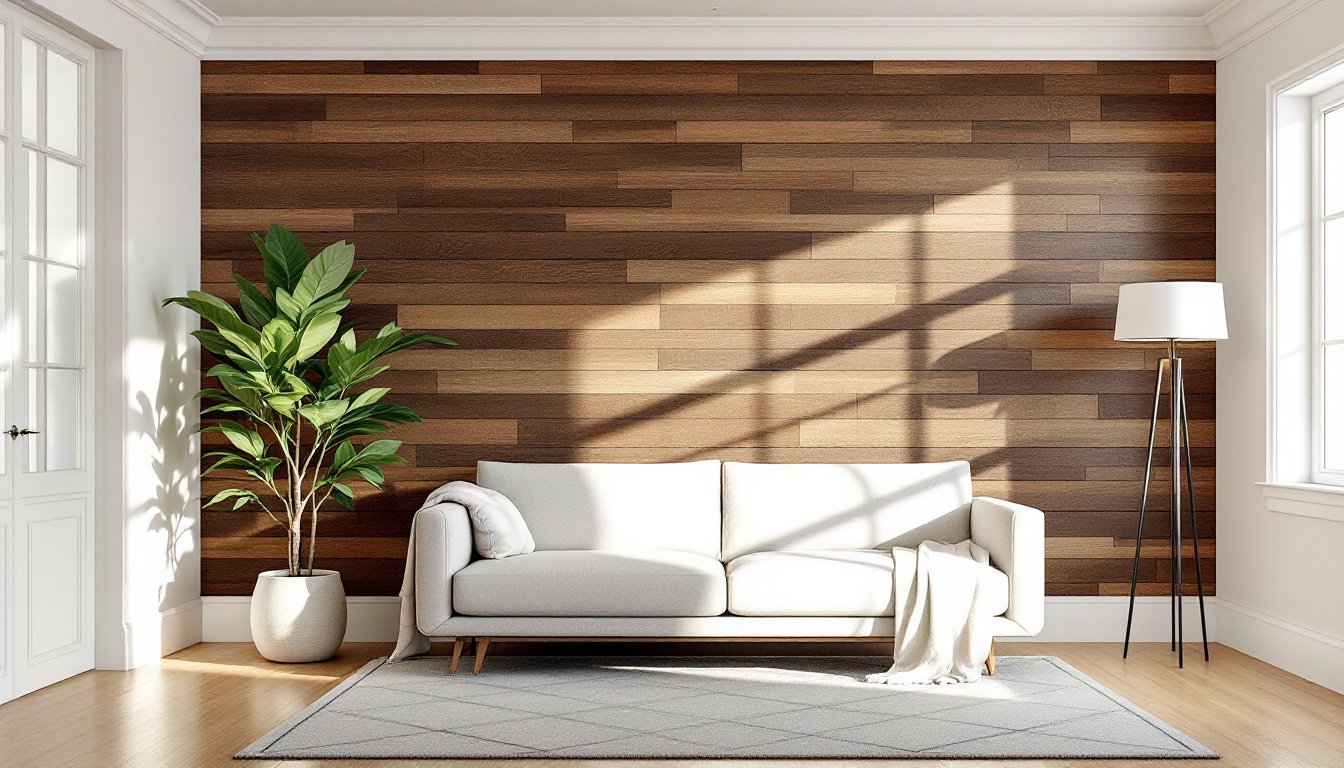
Reclaimed Wood Planks for Rustic Charm
Reclaimed wood delivers instant character, weathered grain, nail holes, saw marks, and color variation that new lumber can’t replicate. Common sources include old barn siding, pallet wood (use heat-treated HT-stamped pallets only to avoid chemical treatments), and salvaged flooring.
Prep work is critical. Reclaimed material must be cleaned, denailed, and inspected for rot or insect damage. Kiln-dried reclaimed lumber is safer for interior use: air-dried pieces can harbor moisture or pests. Run a metal detector over each board to catch hidden nails or staples before cutting.
Planks are typically installed horizontally with random lengths for a staggered, organic look. Use construction adhesive (like Liquid Nails Heavy Duty) along with 18-gauge brad nails into wall studs for secure attachment. If the wall isn’t perfectly flat, shim behind planks as needed to prevent gaps.
Finish options range from clear polyurethane (to preserve raw patina) to matte wax for a low-sheen, touchable surface. Skip high-gloss finishes, they compete with the weathered aesthetic. Reclaimed wood works especially well in entryways, dining rooms, and behind wood-burning stoves (maintain code-required clearances and use a non-combustible backer if needed).
Cost varies widely. Salvaged material can run $2–$8 per square foot depending on species and source: purchasing pre-milled reclaimed panels from retailers like Stikwood or Reclaimed DesignWorks simplifies install but raises cost to $8–$15 per square foot.
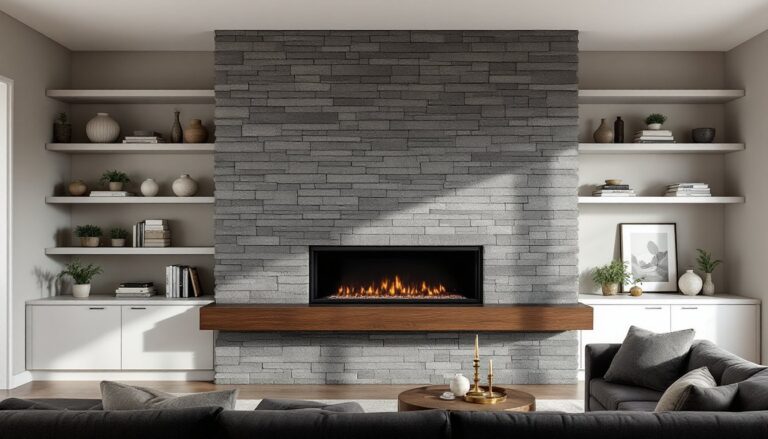
Horizontal Shiplap for a Contemporary Look
Shiplap, boards with a rabbet (notch) cut along each edge, creates tight, overlapping seams that give a clean, linear profile. It’s become shorthand for modern farmhouse style, but when painted or stained in darker tones, it works just as well in minimalist or industrial spaces.
True shiplap uses boards milled with a rabbet joint, but many DIYers use nickel-gap installation with standard 1×6 or 1×8 pine boards, spacing them with 5-cent coins (roughly 1/16″ thick) to create uniform reveals. This method is cheaper and easier to source at big-box stores. Expect to pay around $0.50–$1.25 per linear foot for nominal 1×6 pine (actual dimensions: 3/4″ × 5.5″).
Start installation at the bottom of the wall and work up, using a 4-foot level to keep the first course straight, it sets the reference for every row above. Nail into studs (16″ or 24″ on center) with a finish nailer and 2″ nails, or use a hammer and 8d finish nails if working without a compressor.
The shiplap fireplace accent wall approach using cedar fence pickets is a budget-friendly variation that skips milled shiplap entirely, relying on rough-sawn cedar’s texture and the nickel-gap spacing for visual interest.
Paint-grade shiplap typically gets primed with a stain-blocking primer (especially over pine, which can bleed resin) and finished with satin or eggshell latex. For natural wood tones, apply a water-based polyurethane or penetrating oil to prevent yellowing and simplify future cleaning.
Geometric Wood Panel Designs
Geometric accent walls, herringbone, chevron, hexagons, or 3D relief patterns, add movement and a high-design look that reads as custom millwork. These installs are more labor-intensive and require careful planning, but the results stand out in bedrooms, home offices, and feature walls flanking TVs.
Herringbone uses planks cut at 45° angles and laid in alternating diagonal rows. A miter saw with a sturdy fence and stop block ensures consistent cuts. Planks are typically 1×3 or 1×4 (actual 3/4″ × 2.5″ or 3.5″), and the pattern is built from the center of the wall outward to maintain symmetry.
Chevron is similar but requires cuts at both ends of each plank so pieces meet in a continuous zigzag without offsets. This demands more precision and generates more waste, plan for 15–20% extra material.
3D geometric panels use varying plank depths or box frames to create shadow lines and relief. These can be prefabricated modules (like WallArt or Art3d panels) that mount with adhesive, or custom-built using 1×2 furring strips layered over a base surface.
Layout is everything. Snap chalk lines or use a laser level to establish reference grids before committing to adhesive or nails. Dry-fit the pattern first, geometric designs are unforgiving of measurement drift.
Finish with a unified stain or paint to emphasize the pattern, or use contrasting tones (e.g., walnut and maple) to highlight individual sections. Geometric walls pair well with modern interiors and are frequently highlighted in House Beautiful trend features for their architectural impact.
Vertical Wood Slat Walls for Visual Height
Vertical slat walls use narrow boards spaced evenly (often 2″–4″ apart) over a backing surface to create rhythm and draw the eye upward. They’re ideal for rooms with low ceilings or narrow proportions, and the slatted profile adds ventilation if installed behind media consoles or radiators.
Common materials include 1×2 or 1×3 furring strips (actual 3/4″ × 1.5″ or 2.5″) in pine, poplar, or hardwoods like oak or walnut. For a floating slat look, mount slats to a backing panel (like 1/4″ plywood or MDF) with consistent spacing, then hang the entire assembly as one piece.
Installation starts with locating studs and installing horizontal nailers or a French cleat system at top and bottom for support. Each slat is then fastened vertically, using spacers (cut from scrap plywood or MDF) to maintain uniform gaps. A brad nailer speeds up the process: aim for two nails per slat at each nailer.
Finish options include staining for natural wood tones or painting in monochromatic schemes. Matte black or charcoal slats create a bold backdrop for art or shelving, while lighter woods (maple, ash) keep spaces feeling open.
Vertical slats work behind beds, in entryways, and as room dividers. They’re also modular: if tastes change, individual slats can be removed or rearranged without disturbing drywall. Expect material costs around $2–$5 per square foot for basic pine slats, higher for premium hardwoods.
Safety note: Ensure slats are secured into studs or blocking, especially in homes with children or pets. Freestanding or poorly anchored slats can become pull hazards.
How to Choose the Right Wood Type and Finish
Wood species, grade, and finish determine both the look and longevity of an accent wall. Not all lumber performs equally in interior applications, and finish choice impacts maintenance and durability.
Softwoods like pine and cedar are budget-friendly and widely available. Pine is easy to work with but prone to dents and resin bleed: always prime before painting. Cedar resists moisture and insects naturally, making it a smart choice for bathrooms or basements (ensure adequate ventilation to prevent mildew).
Hardwoods, oak, walnut, maple, or ash, offer superior durability and grain complexity but cost significantly more ($4–$12 per board foot versus $1–$3 for softwoods). Red oak’s open grain takes stain deeply and evenly: walnut delivers rich, dark tones with minimal finishing.
Plywood or MDF panels with wood veneer offer cost savings and dimensional stability (they won’t warp like solid wood) but require edge banding or trim to hide the layered core.
For finishes, water-based polyurethane provides a clear, non-yellowing topcoat with low VOCs, ideal for bedrooms and nurseries. Penetrating oils (like Danish oil or tung oil) enhance grain and are easy to touch up but require reapplication every few years. Stains adjust color while revealing grain: test on scrap pieces first, as end grain absorbs stain differently than face grain.
If painting, use a bonding primer (like Zinsser or KILZ) to ensure paint adheres to resinous woods or glossy surfaces. Semi-gloss or satin finishes are easier to clean than flat paint, especially in high-traffic areas.
Moisture considerations: Acclimate wood to the install environment for at least 48 hours. Lumber stored in a garage or outdoor shed holds more moisture than your home’s interior: skipping acclimation leads to gaps or buckling as the wood adjusts.
Whether opting for budget cedar fence pickets or premium walnut planks, matching the wood type and finish to the room’s use and aesthetic ensures the accent wall looks intentional, not improvised.
Conclusion
A well-executed wood accent wall delivers outsized impact for the effort and cost involved. The key is matching the style, rustic, modern, geometric, or minimalist, to the room’s architecture and the installer’s skill level. Start with a solid layout, don’t skip surface prep, and give the wood time to acclimate before install. With the right materials and a little patience, a weekend project can anchor a room for years.