

Table of Contents
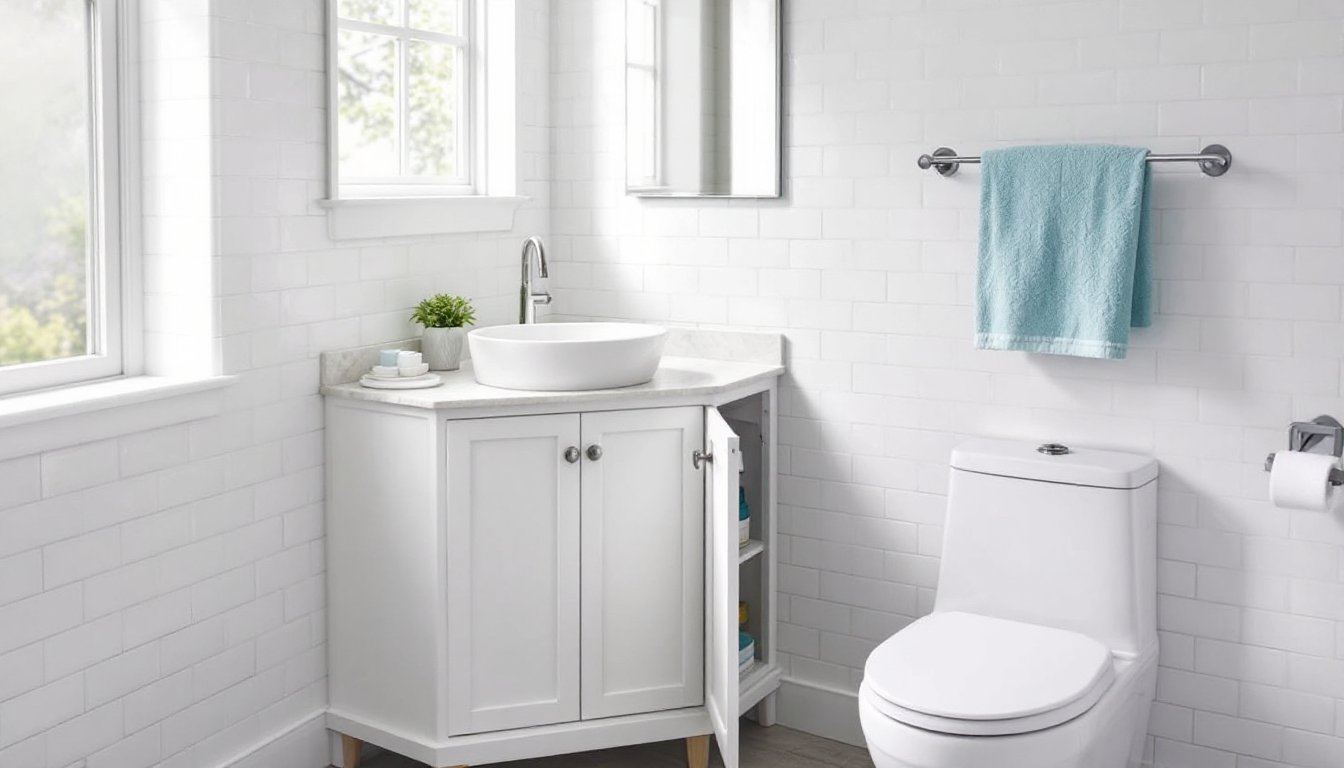
ToggleTight bathroom layouts don’t have to mean sacrificing counter space or storage. A corner bathroom vanity transforms underused angles into functional zones, offering sink access, cabinet storage, and prep area without dominating wall space that could accommodate a toilet or shower enclosure. Whether dealing with a powder room, an en suite tucked under stairs, or a dated full bath with an awkward footprint, corner vanities deliver workspace where conventional models won’t fit. This guide walks through selection, measurement, installation, and storage optimization to help homeowners make the most of every square foot.
Key Takeaways
- A corner bathroom vanity transforms tight layouts by fitting into unused 90-degree angles, freeing up wall space for towel bars, shelving, and fixture clearances while maintaining full functionality.
- Corner vanities typically measure 24 to 30 inches per side, making them ideal for small spaces where standard 36-inch vanities won’t fit, and their angled fronts reduce protrusion into the room.
- Wall-mounted corner vanities require solid 3-inch structural screws into studs or 2×6 blocking, while freestanding models offer simpler installation but consume more visual space.
- Accurate measurement using the 3-4-5 triangle method and checking for obstructions like electrical outlets, P-traps, and door swing clearance prevents costly installation errors and code violations.
- Corner bathroom vanity storage can be maximized with lazy Susans, pull-out trays, drawer inserts, door-mounted racks, and recessed medicine cabinets to recover hard-to-reach corner spaces.
- Plumbing consolidation in a corner location simplifies rough-in work by clustering water supply and drain lines, reducing pipe runs and materials compared to conventional vanity placements.
Why Choose a Corner Bathroom Vanity?
Corner vanities unlock floor space in bathrooms where every inch counts. By nesting into a 90-degree angle, they free up wall runs for towel bars, vertical shelving, or compliance clearances around fixtures, critical in half-baths that must meet the 15-inch minimum clearance from toilet centerline to sidewall per IRC R307.1.
Small corner bathroom vanity units typically measure 24 to 30 inches per wall leg, fitting where a standard 36-inch single-sink vanity won’t. They’re also easier to navigate around in cramped quarters: the angled or curved front edge shortens the protrusion into the room compared to a rectangular unit of similar storage volume.
Another advantage: plumbing consolidation. Clustering water supply and drain lines in one corner simplifies rough-in, especially in attic conversions or basement additions where running new pipe across long spans adds cost and complexity. A corner vanity bathroom sink setup often shares the same wet wall as the shower or tub, reducing pipe runs and materials.
Finally, corner installations can hide layout flaws. An off-center window, angled ceiling, or wall jog that makes centered vanities look awkward disappears when the focal point moves to a corner.
Types of Corner Bathroom Vanities
Corner vanities come in several configurations, each suited to different structural and aesthetic needs.
Wall-Mounted vs. Freestanding Corner Vanities
Wall-mounted corner vanities hang from blocking or studs, leaving the floor visible beneath. This floating profile makes small bathrooms feel larger and simplifies cleaning. Installation requires locating studs or installing 2×6 or 2×8 blocking between studs during framing or as a retrofit through drywall patches. Use 3-inch structural screws into solid wood: toggle bolts alone won’t support a vanity loaded with tile countertops and toiletries over time. Wall-hung units work best on exterior walls or partition walls with accessible stud bays. Verify that plumbing doesn’t interfere with screw placement before committing to a model.
Freestanding corner vanities rest on legs or a toe kick, transferring weight to the floor. They’re simpler to install since they don’t demand precise stud alignment, and they hide plumbing inside the cabinet body. Freestanding models suit older homes where wall integrity is uncertain or where tenants need removable fixtures. The tradeoff: they consume visual space and trap dust underneath unless the toe kick is sealed.
Both types are available with or without tops. Vanities sold as ready-to-assemble (RTA) kits save on shipping but require careful squaring during assembly: a corner that’s out of plumb by half an inch will create visible gaps against walls. Pre-assembled units cost more but arrive square and sturdy.
Some manufacturers offer triangular corner vanities with a single angled front, while others use a truncated rectangle with two wall-facing sides and a shorter angled or curved apron. Triangular models maximize the corner footprint but offer less usable countertop: rectangular variants provide a wider landing zone for toiletries at the expense of deeper cabinet reach.
Measuring Your Space for a Corner Vanity
Accurate measurement prevents costly returns and installation delays. Start by confirming the corner is square: use a framing square or the 3-4-5 triangle method. If walls meet at an angle other than 90 degrees, note the deviation, some vanities include adjustable legs or scribing strips to compensate, but severe out-of-square corners may require furring strips to create plumb surfaces.
Measure from the corner apex outward along each wall in three places: at floor level, countertop height (32 to 34 inches, standard vanity range), and just below the ceiling. Record the shortest dimension: settling, framing lumber shrinkage, or drywall inconsistencies often create taper. Subtract ½ inch per side for clearance and final leveling shims.
Check for obstructions: electrical outlets (must remain accessible per NEC 210.52(D)), hot-water risers, shutoff valves, and P-traps. A corner bathroom vanity with sink will need a 1½-inch drain line and two ½-inch supply lines: verify existing stub-outs align with the vanity’s plumbing knockouts. If retrofitting a space previously occupied by a pedestal sink, expect to relocate drains: pedestal sinks often center their traps, while corner vanities offset them.
Measure door swing clearance. IRC R307.1 requires bathroom doors to swing outward or allow 21 inches minimum in front of the toilet. A vanity that crowds the door arc creates a code violation and daily annoyance.
Finally, measure vertical clearance if installing wall sconces or medicine cabinets above the vanity. Allow 4 to 6 inches between the countertop backsplash and the bottom edge of a light fixture to prevent shadows and moisture contact.
Design Styles and Material Options
Corner vanities span traditional to contemporary aesthetics, letting homeowners match existing trim and fixtures or introduce contrast.
Material options for cabinet boxes include plywood, MDF (medium-density fiberboard), and solid wood. Plywood resists moisture better than MDF and holds screws more reliably in hinge zones, but costs more. MDF offers a smooth paint surface and dimensional stability: if choosing MDF, verify it’s moisture-resistant (MR-MDF) or apply oil-based primer to all edges before installation to seal against humidity. Solid hardwood (maple, oak, cherry) looks rich but requires seasonal humidity control: unfinished interiors can warp in bathrooms without exhaust fans.
Countertop choices include cultured marble, quartz composite, solid-surface acrylic, granite, and tile. Cultured marble integrates the sink bowl, eliminating rim joints where water and mildew collect, but scratches more easily than quartz. Quartz and granite add weight, verify wall blocking or floor support if selecting a slab top over 50 pounds. Tile countertops allow custom edge treatments and color matching but require periodic grout resealing: use epoxy grout around the sink cutout for water resistance.
Doors and drawer fronts come in shaker, raised panel, slab, and louvered profiles. Shaker and slab styles suit modern and transitional looks: raised panels read traditional. Louvered doors add ventilation, helpful if storing damp towels, but collect dust in the slats. When reviewing design inspiration and material combinations, note how hardware finish, brushed nickel, matte black, oil-rubbed bronze, ties the vanity to faucets and lighting.
Finishes range from painted to stained to laminate-wrapped. Painted finishes hide wood grain and suit coastal or farmhouse schemes: use semi-gloss or satin sheen for scrubbability. Stains showcase grain but require polyurethane topcoats (three coats minimum, sanding between) to resist water rings. Laminate and thermofoil wraps offer easy cleaning and consistent color but can delaminate if edges take repeated moisture hits, seal cut edges during installation.
Installation Tips for Corner Bathroom Vanities
Successful installation starts with shutting off water at the fixture shutoffs or main if individual valves are absent. Open the faucet to relieve pressure, then disconnect supply lines and the P-trap. Keep a bucket and rags handy: residual water in traps always spills.
If installing a wall-mounted unit, locate studs with a stud finder and mark centerlines. Drill pilot holes and drive 3-inch #10 structural screws into studs at the height specified by the manufacturer’s template, usually 30 to 32 inches to the bottom edge of the mounting rail. Use a 4-foot level to confirm the rail is plumb side-to-side and front-to-back: even a half-degree tilt will cause the vanity to sit unevenly and doors to swing open.
Freestanding vanities need leveling shims. Set the unit in place, check with a level on both the side-to-side and front-to-back planes, then slip composite shims (not wood, which compresses and splits) under low corners. Once level, anchor the vanity to wall studs with 2½-inch screws through the back rail to prevent tipping, especially important if drawers fully extend and create a cantilever load.
Before securing the vanity permanently, dry-fit the faucet and drain assembly. Some corner vanities have tight interior clearances: a widespread faucet with separate hot and cold valves may not fit if the cabinet interior has a center brace. Confirm the P-trap aligns with the drain stub-out: if it’s off by more than an inch, you’ll need an offset tailpiece or adjustable P-trap extension.
Apply a bead of silicone caulk along the vanity’s back edges where it meets the wall, and along the countertop-to-backsplash joint. Tool the caulk smooth with a wet finger or caulk shaper within five minutes. Silicone adheres better than latex in wet environments and remains flexible as materials expand and contract.
For plumbing connections, use braided stainless-steel supply lines: they’re more forgiving of slight misalignment than rigid copper and less prone to bursting than plastic. Hand-tighten, then turn one additional quarter-turn with an adjustable wrench, overtightening cracks compression fittings. Turn water back on slowly and inspect all joints for leaks before closing up.
Maximizing Storage in Your Corner Vanity
Corner cabinets trade depth for angle, creating hard-to-reach zones in the back wedge. Smart organizers and layout tweaks recover that lost space.
Lazy Susans and kidney-shaped pull-out trays make corner storage accessible. A two-tier lazy Susan fits most corner vanity bathroom sink cabinets and brings back-corner items to the front with a spin. Kidney trays slide on undermount rails and pivot outward, clearing the cabinet door frame. Both require a minimum 18-inch depth from door hinge to back wall: measure before ordering.
Drawer inserts for the top drawer corral small items, cosmetics, razors, dental supplies, that otherwise migrate to the back. Divide the drawer into thirds with adjustable pegs or a rigid bamboo organizer. Reserve the deepest section for tall bottles.
Door-mounted racks add storage without consuming interior volume. Adhesive hooks hold hair tools: over-the-door metal baskets store cleaning supplies. Verify door swing clearance: racks thicker than 2 inches can prevent doors from closing flush.
If retrofitting a vanity with no drawers, consider slide-out shelves on undermount soft-close runners. They’re sold as retrofit kits at home centers and install with four screws per shelf. A single pull-out shelf in the lower cabinet doubles usable space by eliminating the need to crouch and reach.
For inspiration on organizing compact vanities and making the most of tight layouts, browsing bathroom storage solutions can reveal custom drawer dividers, pull-out hampers, and appliance garages scaled for small footprints.
Outside the cabinet, use vertical wall space. A narrow open shelf or ladder rack beside the vanity holds towels and decorative items without adding floor footprint. Recessed medicine cabinets installed between studs keep daily essentials within reach and off the counter, maintaining a clean look even when the vanity is small.
Finally, resist the urge to overfill. Corner vanities work best with a curated inventory: excess items spill onto counters, negating the space-saving advantage. Audit bathroom supplies seasonally and relocate bulk backups to a linen closet or hallway cabinet.